
This page describes how to disable or uninstall a plug-in.
Contents |
Introduction
You can disable a plug-in that you no longer want to use, or you can uninstall it completely. If you choose to uninstall a plug-in, you will need to disable the plug-in first.
You can also use these instructions to uninstall old versions of a plug-in.
Disabling a plug-in
To disable a plug-in:
- From the Help menu in Eclipse or Aptana, select Software Updates > Manage Configuration to open a Product Configuration window.
- On the Product Configuration window, expand the tree on the left and select the plug-in that you want to disable.
- On the right side of the Product Configuration window, click the Disable link to disable the plug-in.
- Re-start your workbench.
Uninstalling a plug-in
After you have disabled a plug-in, you can uninstall the plug-in. Note: Old versions of plug-ins will automatically be disabled, so you should be able to uninstall old versions of a plug-in by following the instructions below.
To uninstall a plug-in:
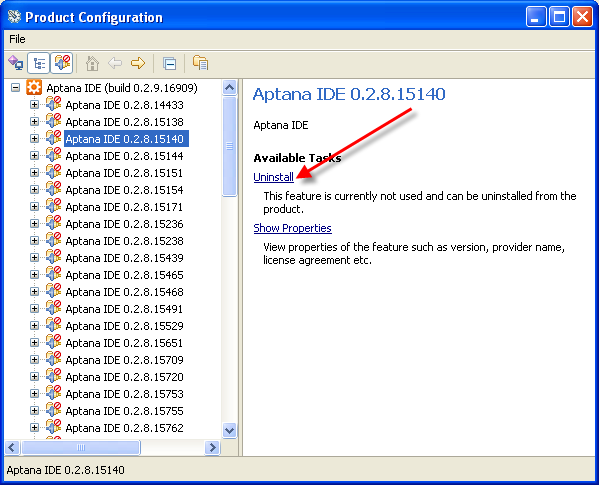
- From the Help menu in Eclipse or Aptana, select Software Updates > Manage Configuration to open a Product Configuration window.
- On the Product Configuration window, toggle the Show Disabled Features button
 on.
on.
- On the left side of the window, select the plug-in that you want to uninstall.
- On the right side of the screen, click the Uninstall link (shown below) to uninstall the plug-in.
- Re-start your workbench.