The first step in preparing your application for distribution is packaging the contents into an .air file and Aptana Studio provides a simple wizard for this purpose.
For the configuring certificates URL, please refer to Configure Certificates Preferences. Future features such as import certificates can be completed here.
Contents |
Adobe Air Package Exporter
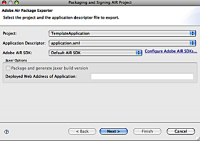
- Select your project
- Select the application descriptor file
- Select the AIR SDK. Aptana ships an AIR SDK (v1.5) with this plugin but you can specify another SDK by clicking on Configure Adobe AIR SDKs
- Optionally package and generate the Jaxer build version, an option that's only available if you created a Jaxer version of your app in the New Project Wizard
-
Digital Signing
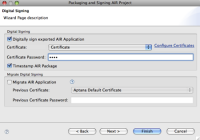 Digital Signing
- Choose whether or not to sign your packaged application. If you choose not to sign it, the generated file will be an AIRI (or AIR Intermediate) rather than an AIR file, which can not be deployed or installed.
- Select the Certificate that you would like to package. Initially there are no certificates configured so click Configure Certificates to add your certificate; an Aptana Default Certificate is included with this plugin though we recommend using your own or a commercial cert if warranted by your application.
- Enter your certificate's password.
- If the timestamp option is checked, ADT automatically contacts a timestamp authority server and the information returned is included in the final AIR file. An AIR file that includes a verified timestamp can be installed at any point in the future.
-
File Selection
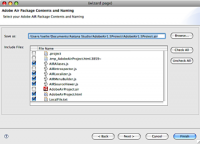 File Selection
 Select the files to include in your package.
Create an application badge
The new Adobe Air Badge adds install detection logic and launch now capabilities into a simple button which can be posted to any website.
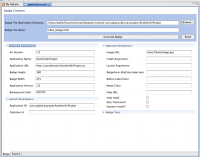 Badge Properties
- Click on your project's application.xml
- Select the Badge Tab
- Enter your Application URL--the website on which you plan to host your application
- Confirm the badge destination directory
- Click Generate Badge
-
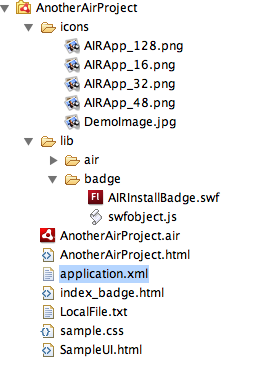
The file name you chose is created and there's a new badge directory with library file under the lib directory as well as new icons in the icon dir. The badge file will open by default.
Troubleshooting
Why am I getting the "Could not generate timestamp: Connection timed out: connect" error?
Your computer needs to be connected to the Internet during this process so that the time stamp can verify itself with a time stamp service provided by Adobe. From the Adobe documentation:
"When you sign an AIR file, the packaging tool queries the server of a timestamp authority to obtain an independently verifiable date and time of signing. The time stamp obtained is embedded in the AIR file. As long as the signing certificate is valid at the time of signing, the AIR file can be installed, even after the certificate has expired. On the other hand, if no time stamp is obtained, the AIR file ceases to be installable when the certificate expires or is revoked. By default, the AIR packaging tools obtain a time stamp. However, to allow applications to be packaged when the time-stamp service is unavailable, you can turn time stamping off. Adobe recommends that all publicly distributed AIR files include a time stamp."
