
If you are already an Eclipse user, you can install Aptana as a plug-in directly into your current Eclipse configuration.
This will work only with the SDK version of Eclipse, such as Eclipse Classic, not the straight platform version. (Note that the Eclipse Classic link is for the version current at the time this is written, v3.4.1, and you should use the the version appropriate at the time you install.)
- From the Help menu in Eclipse, select Software Updates > Find and Install... to open an Install/Update pop-up window (shown below). On Eclipse 3.4, after following the above
steps, there will be two menu items. You want the one without the ellipsis (...)
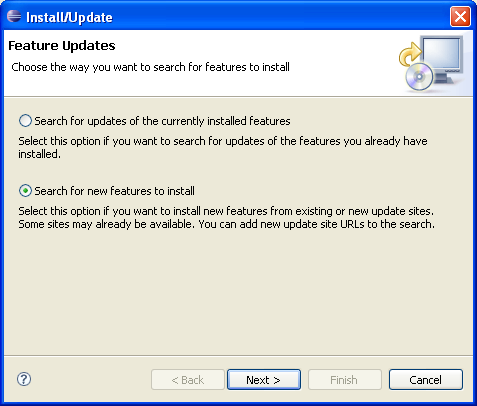
- On the Install/Update pop-up window, choose the Search for new features to install option, and click the Next button.
- Add a new remote site to add the Aptana plug-in:
- Click the New Remote Site... button to open a New Update Site pop-up window.
- On the New Update Site pop-up window, type Aptana in the site Name text box.
- In the URL text box, type the URL for the Aptana update site: http://update.aptana.com/install/studio/3.2/ (shown below) and click OK.

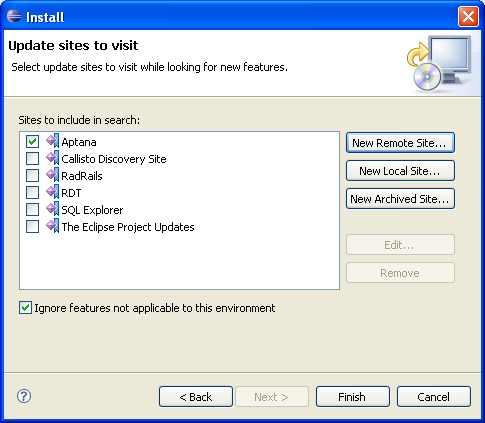
- Click the Finish button to switch to the Updates window.
- On the Updates window, check the Aptana box (shown below), and click the Finish button.
- On the next screen, check the Aptana box, and click the Next button.
- Choose the option to accept the terms of the license agreement, and click the Next button.
- Click the Finish button.
- Click the Install All button.
Eclipse installs the Aptana plug-in. To finish the installation process, follow the prompts to shut down and re-start Eclipse.
To access all of Aptana's features as they are described in the Aptana documentation, you will need to change your Eclipse Perspective to the Aptana perspective. See Changing your Eclipse Perspective for instructions on how to change your Eclipse Perspective.
Eclipse 3.2 on Mac OS X
If you run into the JVM terminated Exit Code=11 error message after Studio launches, please upgrade to Eclipse 3.4 as there are errors in the older version of Eclipse that are only fixed in the newer version.
Installing manually
Download the latest release from http://update.aptana.com/install/studio/3.2/ and follow the manual installation instructions on the page.
Note: You may need to start Eclipse from the command-line with the "clean" option: eclipse -clean if the update didn't seem to work correctly.