The AMPLIFY Appcelerator Platform Services SDK for iOS provides APIs for your iOS application built with Objective-C to access Mobile Backend Services (MBS).
Getting the SDK
To download and start using the SDK, you first need to register a new iOS application in Dashboard. See Managing Non-Titanium Client Applications in Dashboard for details on registering a new application. After you register an application, a service key is generated that associates your application with all the Platform services. The Dashboard also provides full instructions for enabling all Platform Services in your application. This guide will deal specifically with enabling and using Mobile Backend Services in an iOS application.
Running the APSCloud Example application
The SDK ZIP file includes an iOS sample project that demonstrates basic usage of each of the Cloud APIs. To run the sample, register a new application in Dashboard to obtain the necessary service application. You will then copy the key into the imported sample project's application delegate, then run the application.
To create the APSCloudExample application in Dashboard:
- Login to the Dashboard.
- If you are a member of multiple organizations, from the User menu, select the organization to associate with the application.
- Click the Add menu (+) and select Register App for Services.
- In the dialog:
- Enter APSCloudExampleApp (or another name) in the Name field.
- Select iOS from the Platform menu.
- Select any category from the Category menu.
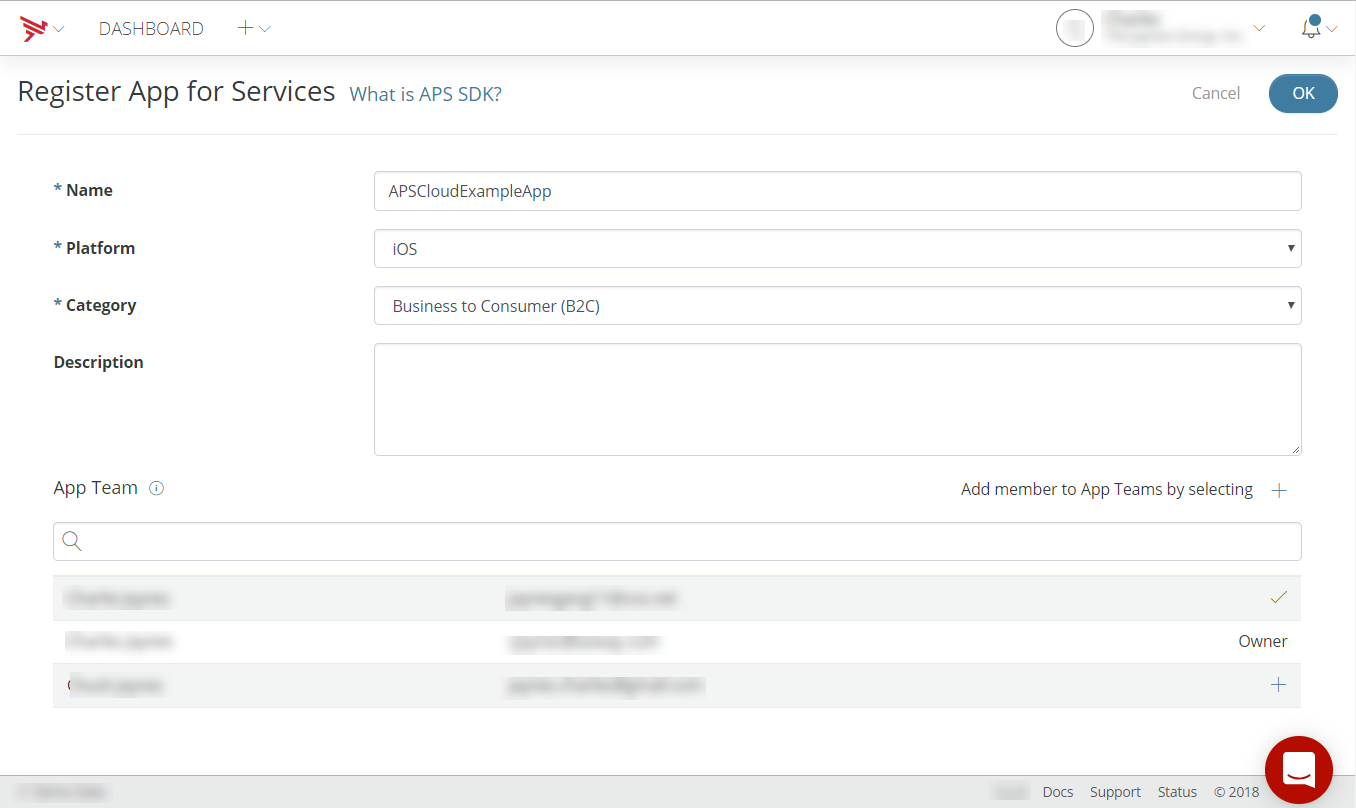
- (Optional) Click the + icons to add additional team members.
- Click OK.
- Click the Services tab.
- Select Development from the Environment menu, then click the clipboard icon to copy
the key to your clipboard.

Next, import the APSCloudExample project into Xcode, copy the key from your clipboard into the application delegate, and run the application.
To import the completed APSCloudExample project:
- In Xcode, open the
appcelerator-sdk-ios-<VERSION>/examples/APSCloudExample.xcodeproj. -
Open
AppDelegate.m, add the code below to your application delegate'sapplication:didFinishLaunchingWithOptionsmethod, and replace << YOUR APP KEY >> with the application key you copied to your clipboard previously.[[APSServiceManager sharedInstance] enableWithAppKey:@"<< YOUR APP KEY >>"]; -
Run the application on an iOS device or simulator.
Once the application is running, try the following:
-
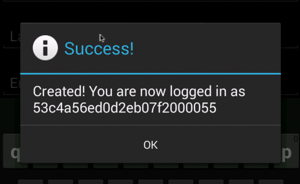
Create a new user by selecting Users > Create User. Enter a username, password and password confirmation and then click Create. If the user is created successfully, the following dialog is shown:
-
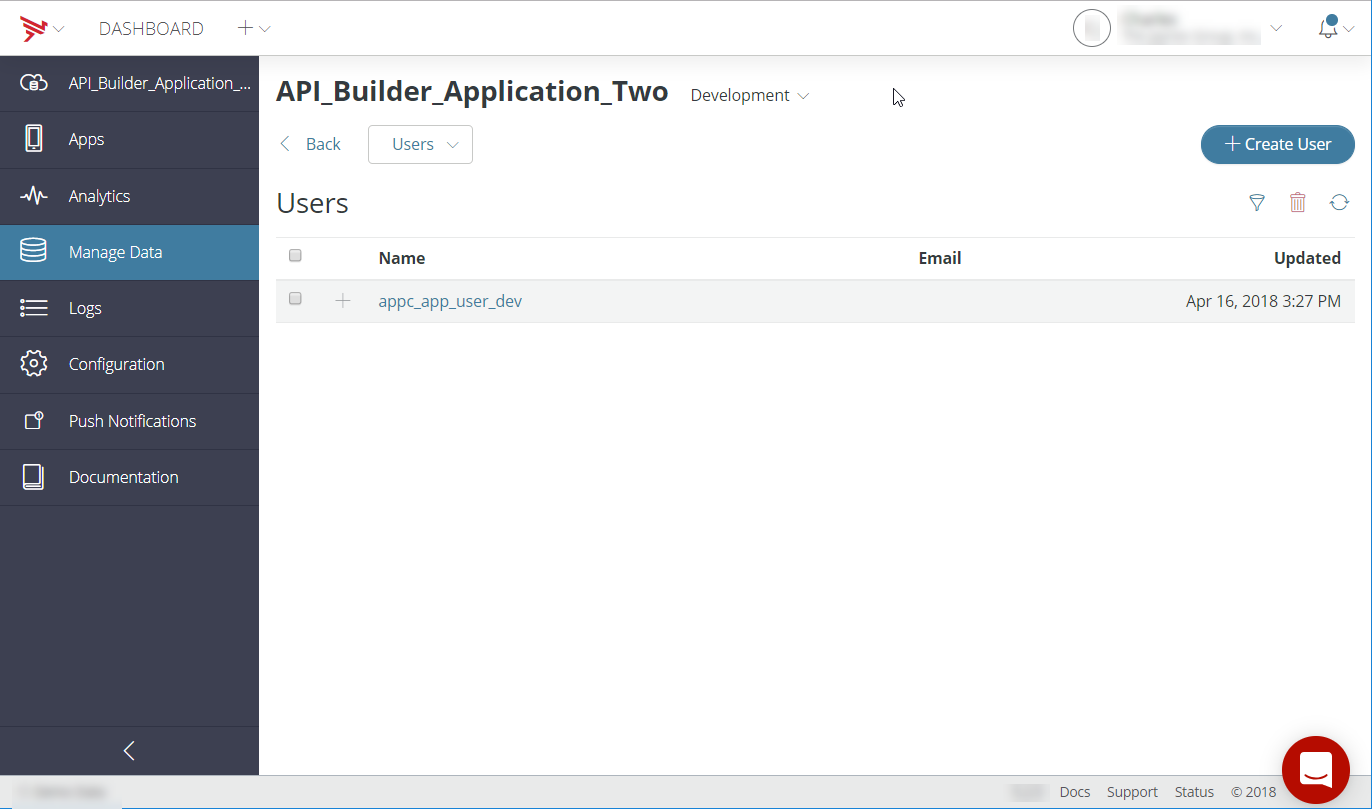
View the newly created user in Dashboard:
- Open Dashboard and select your application from the Apps menu.
- Select Manage Data, then click Users in the Manage Data Objects table. You should see the user you created
listed in the Users table.
Enabling Cloud services in a new project
Once you've registered an application in Dashboard, downloaded the SDK, and obtained your application service key, there are few steps to enable Cloud services in your iOS project. The steps are slightly different if you are using Xcode 6 or 5.
To enable the Cloud service in an existing Xcode project:
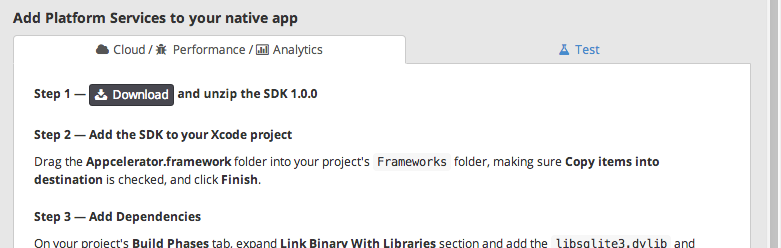
- Add the
appcelerator-sdk-ios-<VERSION>/Appcelerator.frameworkfolder to your project:- For Xcode 5 projects, drag the Appcelerator.framework folder to your project's Frameworks folder, making sure Copy items into destination group's folder is checked, and click Finish.
- For Xcode 6 projects, drag the Appcelerator.framework folder to the project's root folder, making sure Copy Items if Needed is checked, and click Finish.
- On your project's Build Phases tab, expand the Link Binary With Libraries section and add the libsqlite3.dylib and libz.dylib frameworks.
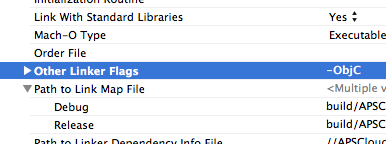
- On your project's Build Settings tab, click All in the top-left corner, then expand the Linking section.
- In the Other Linker Flags field, enter -ObjC.
-
Import
Appcelerator.hinto your application delegate:#import <Appcelerator/Appcelerator.h> -
Lastly, initialize Platform services by calling the
[APSServiceManager enableWithAppKey]method, replacing << YOUR APP KEY >> with the service key generated by Dashboard when you created your application. (See View Application Information for information on how to locate your application key.)[[APSServiceManager sharedInstance] enableWithAppKey:@"<<YOUR APP KEY>>"];
At this point, your application can begin making API calls.
Making API calls and handling responses
The iOS framework includes a collection of classes whose methods map to
individual REST API method endpoints. For example, the APSUsers create method corresponds to the /users/create.json method endpoint.
Alternatively, you can use the generic APSCloud sendRequest method to make REST calls directly against the Cloud APIs. For more information, see Making Generic REST API Calls.
Building request parameters
The first parameter of each Cloud API method is a NSDictionary object that contains the of parameters to send with the request.
For example, the APSPhotos show method takes a photo_id parameter whose value is, naturally, the ID of the photo to show.
// Create dictionary of parameters to be passed with the requestNSDictionary *data = @{@"photo_id": self.photoId};[APSPhotos show:data withBlock:^(APSResponse *e) { // Handle response}]; |
Handling responses
The second parameter of each method call is a block that is passed to an APSResponse whose properties contain information about the response. For instance,
the success property contains a boolean indicating if the method call was successful
or not; the response property returns a JSON-encoded object with the results of the method
call.
NSDictionary *data = @{@"photo_id": self.photoId};[APSPhotos show:data withBlock:^(APSResponse *e) { // The block will be called on the thread the request was started on if (e.success) { // Remove the backslashes from URLs in the JSON self.textView.text = [e.responseString stringByReplacingOccurrencesOfString:@"\\" withString:@""]; } else { [Utils handleErrorInResponse:e]; }}]; |
Note that the block will be called on the thread that the request was started on.
Example: APSUsers login call with response handler
The following example logs in an existing MBS user by their username and password. After a successful login, the application displays an alert indicating a successful login.
// Create dictionary of parameters to be passed with the requestNSDictionary *data = @{ @"login": self.usernameField.text, @"password": self.passwordField.text};[APSUsers login:data withBlock:^(APSResponse *e) { // The block will be called on the thread the request was started on if (e.success) { NSString *userId = [[[e.response objectForKey:@"users"] objectAtIndex:0] objectForKey:@"id"]; NSString *msg = [NSString stringWithFormat:@"Logged in! You are now logged in as %@", userId]; [[[UIAlertView alloc] initWithTitle:@"Success" message:msg delegate:nil cancelButtonTitle:@"OK" otherButtonTitles:nil] show]; } else { [Utils handleErrorInResponse:e]; }}]; |
Monitoring request progress
For Cloud API methods that involve uploading large files, such as APSPhotos create or APSFiles create, there is an overloaded version that takes an
additional progressBlock parameter. This parameter is a code block that is periodically invoked
and passed a float value indicating the progress of the request, and a
boolean indicating if the request is for an upload (YES) or download (NO).
Example: APSPhotos create a call with progress handler
The following example creates a new Photo object from a binary photo attachment.
The progressBlock code block sets the progress property on a ProgressBar object, displaying the status of the upload.
NSDictionary *data = @{ @"photo": self.photoData, @"photo_sync_sizes[]": @"small_240"};[APSPhotos create:data withBlock:^(APSResponse *e) { // The block will be called on the thread the request was started on if (e.success) { [[[UIAlertView alloc] initWithTitle:@"Success" message:@"Uploaded!" delegate:nil cancelButtonTitle:@"OK" otherButtonTitles:nil] show]; self.photoData = nil; } else { [Utils handleErrorInResponse:e]; } self.createButton.hidden = NO;} progressBlock:^(float progress, BOOL upload) { // The block will be called on the thread the request was started on self.progressBar.progress = progress;}]; |
Making generic REST APIs method calls
The APSCloud sendRequest method lets you easily make REST API calls directly against MBS, rather than using the specialized classes. In general, you should use the specialized classes as they provide an easier API. However, if new REST methods are deployed to the APS Cloud backend, this approach lets you immediately start using those methods without waiting for an update to the SDK.
To make a generic request, you call APSCloud sharedInstance to get a reference to the shared APSCloud object and then call its sendRequest method. For each call, you must specify the following:
- REST API method endpoint relative to "api.cloud.appcelerator.com/v1". Method endpoints are listed in the corresponding entries in the REST API documentation.
- The HTTP method to use.
- Data to send with the request.
For example, to create a post, pass the sendRequest() method the following information:
- REST API method endpoint:
posts/create.json - The HTTP method to use:
POST - Data to send with the request: at a minimum, you must specify the
contentproperty.
The following example calls the users/login.json REST method directly and logs the result to the console.
NSDictionary *data = [NSDictionary dictionaryWithObjectsAndKeys: @"jalter", @"login", @"pass", @"password", nil];[[APSCloud sharedInstance] sendRequest:@"users/login.json" method:@"POST" data:datahandler:^(APSResponse *e) { NSLog(@"SUCCESS: %hhd", e.success); NSLog(@"ERROR: %hhd", e.error); NSLog(@"MESSAGE: %@", e.message);}]; |
Working with push notifications
The APSPushNotifications class lets your application subscribe, send, and receive push notifications.
To use the class:
- Configure push notification services for your application.
- Register your application to obtain the necessary device token.
Once push services have been configured, the application needs to register
with iOS to receive push notifications. For example, you can add the following
code to the application delegate implementation file in the application:didFinishLaunchingWithOptions: method:
- (BOOL)application:(UIApplication *)application didFinishLaunchingWithOptions:(NSDictionary
                              *)launchOptions {
[[APSServiceManager sharedInstance] enableWithAppKey:@"APS_APP_KEY"]; // Add this code to register for remote notifications UIUserNotificationType types = UIUserNotificationTypeBadge | UIUserNotificationTypeSound | UIUserNotificationTypeAlert; UIUserNotificationSettings *mySettings = [UIUserNotificationSettings settingsForTypes:types categories:nil]; [[UIApplication sharedApplication] registerUserNotificationSettings:mySettings]; [[UIApplication sharedApplication] registerForRemoteNotifications]; return YES;} |
After the application registers with iOS to receive push notifications,
the application needs to register the device with Appcelerator Cloud. Call
the subscribe or subscribeToken method inside the application delegate's application:didRegisterForRemoteNotificationsWithDeviceToken: method. Note that you will need to convert the NSData parameter to
a hex string before passing it to either the subscribe or subscribeToken method.
- (void)application:(UIApplication *)app didRegisterForRemoteNotificationsWithDeviceToken:(NSData *)devToken { // Convert the token to a string const unsigned *tokenBytes = [devToken bytes]; NSString *hexToken = [NSString stringWithFormat:@"%08x%08x%08x%08x%08x%08x%08x%08x", ntohl(tokenBytes[0]), ntohl(tokenBytes[1]), ntohl(tokenBytes[2]), ntohl(tokenBytes[3]), ntohl(tokenBytes[4]), ntohl(tokenBytes[5]), ntohl(tokenBytes[6]), ntohl(tokenBytes[7])]; NSDictionary *subscribeData = @{ @"device_token": hexToken, @"channel": @"friend_channel", @"type": @"ios" }; [APSPushNotifications subscribeToken:subscribeData withBlock:^(APSResponse
*e) { if (e.success) { NSLog(@"Successfully subscribed to push: %@", e.responseString); } else { NSLog(@"Error in registration. Error: %@", e.errorMessage); } }];} |
Once push services have been configured, and you've obtained a device token
by registering your application to receive remote notifications, you can
start calling methods of the APSPushNotifications class.