To send push notifications, Mobile Backend Services (MBS) relies on the FCM for Android applications, and the Apple Push Notification (APN) service for iOS applications. To use these services in your Titanium application, you first need to enable either FCM, or APN for your application, and then configure MBS with information about your push service. This guide walks you through the process of creating and configuring push services for your application.
Configuring push services for iOS devices
To enable Apple Push Notification service for your application, you need to create an Apple Push Notification certificate and upload the certificate to the MBS server. Note that iOS simulators cannot receive Apple push notifications.
Create and Upload a Push Notification Certificate
To create an Apple Push Notification certificate, you need to first create an Explicit App ID. The App ID identifies where to send the push notification, which is tied to the certificate when you create it. After you create the certificate, export the certificate to PKCS #12 format and upload it to the MBS server. This certificate allows the MBS server to communicate with the Apple Push Notification server.
Register an App ID
You first need to register an App ID for your application.
- Log in to the Apple Developer Member Center as the Team Agent or Admin.
- Click Certificates, Identifiers & Profiles.
- Click Identifiers, then click the add (+) button near the top-right corner.
- Under App ID Description, enter a value in the Name field.
- Select the App ID Prefix to use. (You cannot use a Wildcard App ID for an application with push notifications.)
-
In the the App ID Suffix section, select Explicit App ID and enter your application's ID.
- Under App Services, check the Push Notifications checkbox.
- Click Continue, Submit, and Done to complete the process.
The next step is to generate a certificate that approves your application for the Apple Push Notification service.
Generate an Apple Push Notification Certificate
These directions cover how to generate an Apple Push Notification certificate for both testing (Development) and production (Distribution). Only step #4 differs based on which certificate you create.
- Log in to the Apple Developer Member Center as the Team Agent or Admin.
- Click Certificates, Identifiers & Profiles.
- Click Certificates, then click the add (+) button near the top-right corner.
- For application in development, select Apple Push Notification service SSL (Sandbox). For production applications, select Apple Push Notification service SSL (Sandbox & Production), then click Continue.
- Select the App ID that you created previously from the drop-down list, then click Continue.
- Follow the instructions provided for creating a Certificate Signing Request (CSR). Click Continue once you've created the CSR.
- Locate the CSR you created and click Generate. You are returned to the Certificates page with the status listed as Pending. Wait a moment then refresh the page in your browser. If asked to approve the request, click Approve.
- Click Download to download the certificate (.cer) file to your computer.
- Double-click the file to install it into your keychain.
Now that you've created the push notification certificate, you need to export it in a format that you provide API Builder.
Export the Certificate
Once you've created the certificate, you need to export it in a format that you can provide to API Builder.
- Open Keychain Access (Applications > Utilities > Keychain Access).
- Under Categories in the the left side navigation, click My Certificates.
- Select the certificate you installed previously and select File > Export Items....
- Select Personal Information Exchange (.p12) from the File Format menu and click Save.
- Enter a password for the certificate, then click Save.
Keychain exports your certificate as a PKCS #12 file that you upload to MBS to enable Apple Push Notification for your application.
Upload certificate to Dashboard
You use Dashboard to upload the .p12 certificate file to API Builder and enable notifications within your application.
To upload the certificate using Dashboard:
- Open Dashboard and select your MBS application from the Apps drop-down menu.
- Select Push Notifications on the left-side navigation.
- Select the iOS tab.
- Click Choose File, locate the .p12 file you exported previously, and click Open.
- In the Certificate Password field enter the password you selected when you generated the certificate.
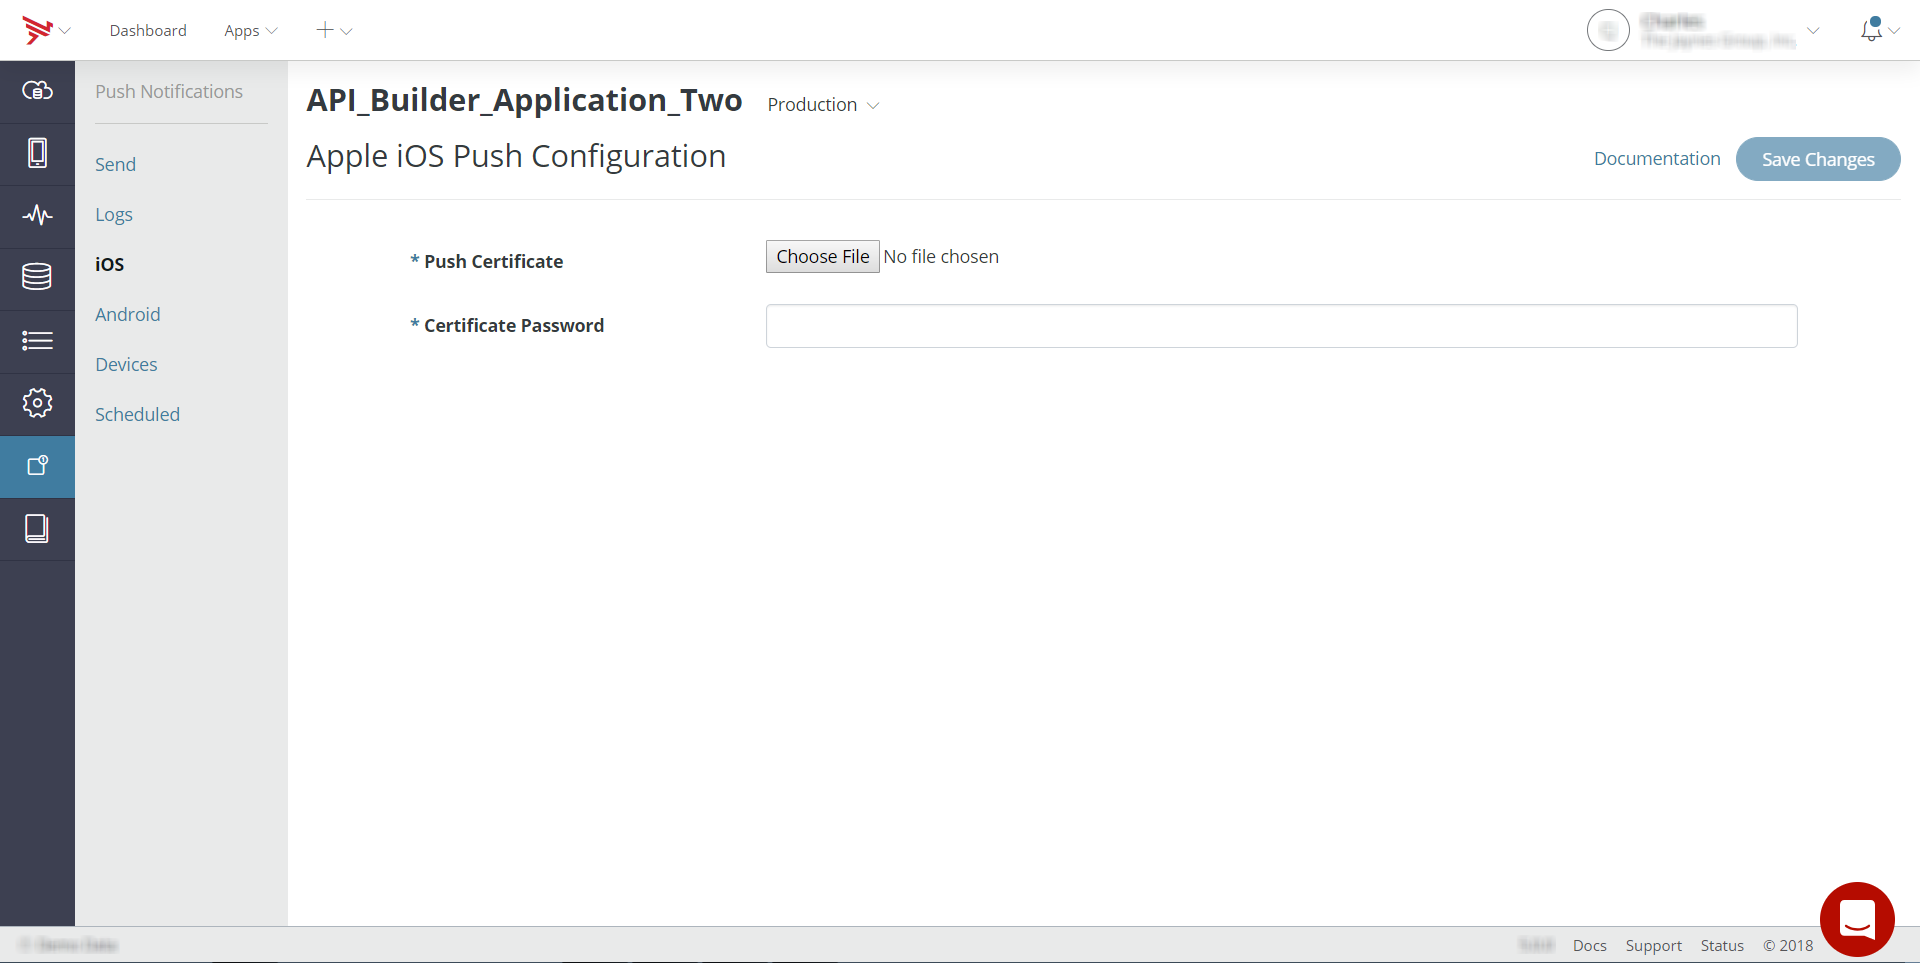
- Click Save Changes. If the password you entered was incorrect, an error dialog will alert you.
Configuring push services for Android devices
To enable push services for your Android application, create a Firebase project, and obtain a send.
Configuring API Builder application for FCM service
With FCM enabled, you need to update your application's settings page in Dashboard with the API key and sender ID you generated.
To configure API Builder for push notifications using Dashboard:
- Open Dashboard and select your application from the Apps drop-down menu.
- Click Push Notifications on the left-side navigation.
- Select the Android tab.
- Enter the server key in the Server Key field and the sender ID in the Sender ID field. To find your Server Key and Sender ID, go to Firebase. From there, click on Settings (cog) > Cloud Messaging. This page will show your Sender ID (should be the same as your project
number) and your Server Key.

- Click Save Changes.
Note: If you are still seeing the following error message when pushing a notification, uninstall the app and rebuild it:
Exception Type: GCM; Error Code: 3006; Error Message: The sender_id contained
in the registration_id does not match the sender_id used to register with the GCM servers |