Contents
Overview
In Aptana Studio 2, there was an option for users to have editor templates which could be used to include multiple template tags. This functionality can be accomplished in Aptana Studio 3 through the use of snippets. This page will show how to convert existing editor templates to Aptana Studio 3.
Exporting Existing Editor Templates from Aptana Studio 2
The editor templates are located under Aptana Studio 2 preferences. For example, if you would like to export your javascript templates, try the following:
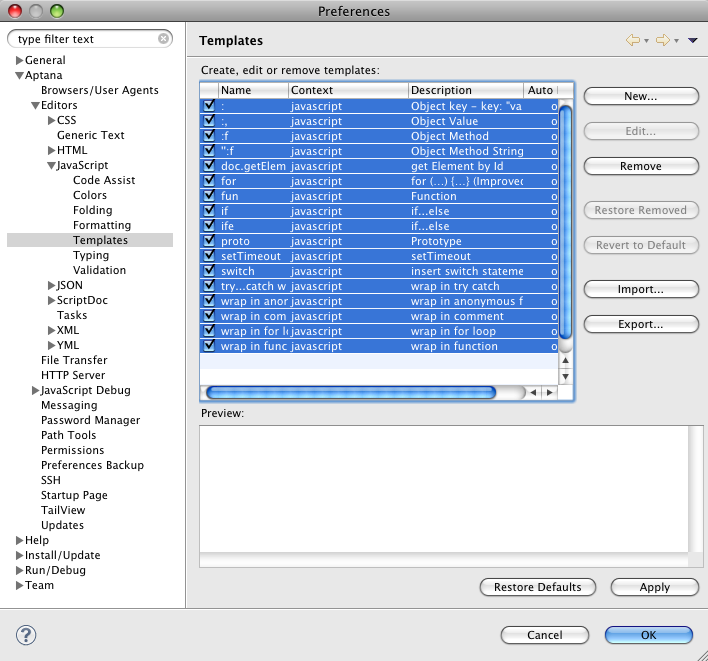
- Navigate to Preferences and go to Aptana > Editors > JavaScript > Templates.
- Highlight all the templates that you would like to export
- Click on Export...
- Select the destination for your exported templates
Editor Template Format
The editor template should be in an XML format. The top level XML node should be a <templates> node, with <template> nodes as children.
Here is an example of an editor template with a single entry
<?xml version="1.0" encoding="UTF-8"?><templates><template autoinsert="true" context="com.aptana.ide.editors.contextType.text/javascript" deleted="false" description="Function" enabled="true" id="com.aptana.ide.editors.js.templates.function.tm" name="fun">function ${name} (${args}) { ${cursor}}</template></templates> |
Converting a template entry
In this section, we will reference the editor template above and convert the template entry into a snippet. From the example above, each <template> node would correspond to a snippet that will want to add to your ruble.
As you may know from the Creating a New Snippet section, there are three key items for a snippet (trigger, expansion and scope). The relationship between the template node and the key items are as follows:
- trigger: the 'name' attribute
- expansion: the content inside the <template> node
- scope: the editor scope where this snippet will be active (in this case it would be javascript)
The description attribute of "Function" also corresponds to the description of the snippet.
The snippet for the template would look like:
snippet "Function" do |s| s.trigger = "fun" s.expansion = "function ${1:name} (${2:args}) { ${3:cursor}}"end |