Contents
Overview
For the most part, if you have to add properties to the AndroidManifest.xml file, you can simply add them to the application's tiapp.xml file. If you encounter a setting that you can't override in tiapp.xml, you can create a custom AndroidManifest.xml file.
How it works
When you create a new mobile application, you will now see an "android"
section inside tiapp.xml. When empty, it just looks like this:
</android> |
Note we've included the official Android namespace qualifier, and the reason
for that is because we wanted the ability to take things out of this section
and plop them right into the AndroidManifest.xml for you. To that end, things that you put inside of a "manifest"
sub-element will be put into your android manifest for you at build time.
See tiapp.xml and timodule.xml Reference for details on elements that you can put in the tiapp.xml file.
Custom Manifest Entries in tiapp.xml
For the most part, if you add a manifest entry to the tiapp.xml file, it replaces the entry in the generated file. Consider the following
section of a tiapp.xml file:
<manifest> <uses-sdk android:minSdkVersion="14" /> <supports-screens android:smallScreens="false" android:normalScreens="true" android:largeScreens="true" android:xlargeScreens="false" /> </manifest></android> |
Most elements inside the <manifest> will be added as children to the <manifest> element inside of AndroidManifest.xml at build time, with some intelligence built in. The <supports-screen> tag in your tiapp.xml replaces the default <supports-screen> tag.
The manifest's all-important <application> element is handled differently. Your elements are applied additively,
rather than replacing the whole <application> element.
For example, let's say you want the debuggable attribute of <application> to be set to true (it's false in the default manifest template), you can do this:
<manifest> <application android:debuggable="true" /> </manifest></android> |
The official Android Developers website describes all the other elements that are supported, such as <service>, <uses-permission> and <activity> for instance, and these will be added using the same logic.
Using a Custom Manifest
In rare circumstances, you may still need to create a custom AndroidManifest.xml. If this is the case, be aware of the following advice:
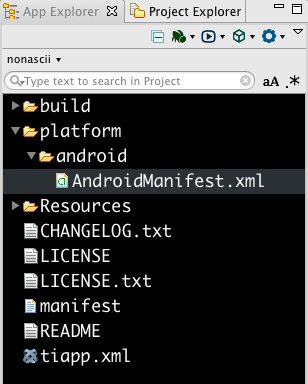
- Name the custom manifest file
AndroidManifest.xml, and put it in the directoryplatform/androidbeneath your application's root project directory.
Create the platform directory if you need to, ensuring that the directory is a sibling of the "Resources" directory, (right below your project root).
- If you do have a custom manifest, generates a file named
AndroidManifest.xml.genin thebuild/androiddirectory during each build. You can use this to see theAndroidManifest.xmlthat would be generated by default.
Ensuring Android Shuts Down Apps Cleanly
The are times when an application needs to be shut down by the platform
outside of the application context, such as when the user changes fundamental
system settings or lets the app sleep for long periods. Unfortunately,
Android's primitive kill process sometimes leads to a known problem where the app is only partially shut down. The
solution for Titanium apps is to set the alwaysRetainTaskState parameter in the AndroidManifest.xml file, as follows (this one is taken from the KitchenSink):
<activity android:configChanges="keyboardHidden|orientation" android:label="KitchenSink" android:name=".KitchensinkActivity" android:alwaysRetainTaskState="true" android:theme="@style/Theme.Titanium"> <intent-filter> <action android:name="android.intent.action.MAIN"/> <category android:name="android.intent.category.LAUNCHER"/> </intent-filter></activity> |