The Email Templates screen lets you create and edit plain text and HTML email templates. The email template's subject and body can contain placeholder values that are dynamically replaced with values you specify when sending the email using the Mobile Backend Services (MBS) email_from_template REST API, Titanium.Cloud.Emails.send() method or equivalent native iOS or Android method. The email can be sent as plain text, HTML, or multi-part using these methods.
Creating an email template
An email template specifies the email subject line and body, which may be HTML or plain-text. You specify the template name when calling email_from_template, the recipients, and values for any placeholder values.
To create an email template:
- In Dashboard, select the Mobile Backend Services datasource for which to create the email template.
- Select Manage Data, then click Email Templates.
- Click + Email Template.
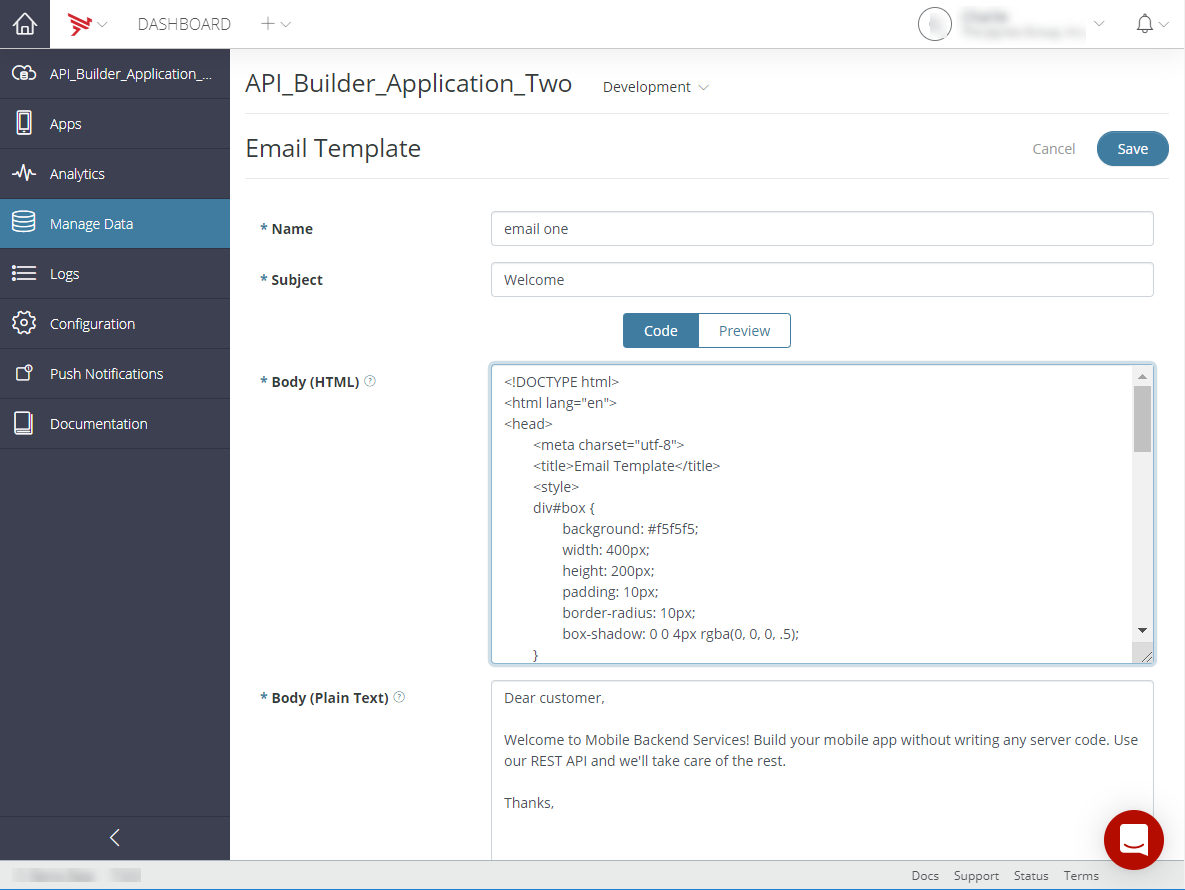
- Click the Code tab, and provide values for the following fields:
- Name – Name of the email template. You will specify this name when sending the email.
- Subject – The email's subject. The subject can contain placeholder values in double curly brackets.
- Body (HTML) – The email's HTML-formatted body text. The body can contain placeholder values in double curly brackets.
- Body (Plain Text) – The email's plain text-formatted body text. The body can contain placeholder values in double curly brackets.
- Click Preview to view a rendered version of the HTML body text.
- Click Save.
Below is the sample HTML used in the above screenshot:
Editing an email template
To edit an email template:
- In Dashboard, select the Mobile Backend Services datasource for which to edit an email template.
- Select Manage Data, then click Email Templates.
- Select the + icon for the email template to edit. The email template details are displayed.
- Select the Action icon for the email template. You may have to scroll to the right.
- Select Edit from the Action menu list.
- Make the desired changes to the email template.
- Click Save.
Deleting an email template
To delete an email template:
- In Dashboard, select the Mobile Backend Services datasource from which to delete an email template.
- Select Manage Data, then click Email Templates.
- Select the + icon for the email template to delete. The email template details are displayed.
- Select the Action icon for the email template. You may have to scroll to the right.
- Select Delete from the Action menu list.
- Click Continue to confirm the deletion of the email template.
Sending email based on a template
To send an email based on a template, call the email_from_template MBS method from your application. For example, the following code example
uses the Titanium.Cloud.Emails.send() method to send an email based on
the 'welcome_template' to a user.
Cloud.Emails.send({ template: 'welcome_template', recipients: 'nobody@appcelerator.com'}, function (e) { if (e.success) { alert('Success'); } else { alert('Error:\n' + ((e.error && e.message) || JSON.stringify(e))); }}); |
Using placeholder fields
The template's subject and body can contain placeholder fields delineated
by double curly brackets ({{}}). When sending an email, you include a parameter for each placeholder field that specifies the
value to insert. For example, suppose that your email template's subject
field contains Hi {{first_name}}!. When sending the email, you would include a first_name parameter, as shown below:
curl -F "recipients=joe@company.com" -F "template=welcome" -F "first_name=Joe" https://api.cloud.appcelerator.com/v1/custom_mailer/email_from_template.json?key=<YOUR APP APP KEY> |
In a Titanium application, you would add the placeholder field as another
parameter to the send() method:
Cloud.Emails.send({ template: 'welcome_template', recipients: 'jim@appcelerator.com', first_name: 'Jim'}, function (e) { if (e.success) { alert('Success'); } else { alert('Error:\n' + ((e.error && e.message) || JSON.stringify(e))); }}); |