
This page describes how to add a source control plugin, such as Subversion or Perforce, to Aptana.
Contents |
Introduction
You can easily add source control plugins into your Aptana installation. We currently include access to Subversion and Perforce, by default, but you can either configure a connection to an update site for a different plugin, or if enough users request a different source control plugin, we may support it in the future.
Instructions
You can either use the Plugins Manager View to install a source control plug-in or manually install the plug-in.
Installing source control via the Plugins Manager
The Plugins Manager View offers an easy way to install the Subclipse and/or Subversive plug-ins for Subversion. To quickly install either of these, select which plug-in you would like to use and follow the instructions in Managing Plugins with the Plugins Manager View.
Manually installing a source control plug-in
If you would like to use a different source control plug-in than Subclipse or Subversive or just prefer to install manually, you can install your source control plug-in by following the instructions in Installing a plug-in.
The chart on the Quick reference for popular plug-ins page gives update URL's for several popular plug-ins.
Subversion Installation Help
Two popular plugins for Subversion integration are Subclipse and Subversive. In order to communicate with Subversion, they require a third-party library. We ship a pure java version of this library called SVNKit, but it may have issues connecting to some Subversion repositories, particularly those that use Digest authentication. In order to get around these compatibility issues, you can install the native library called "JavaHL". Instructions are below:
Windows
JavaHL should already be included with your download of Subclipse or Subversive. If not:
- Visit this page: http://subversion.tigris.org/servlets/ProjectDocumentList?folderID=91
- You need to download the standard package as well as the JavaHL version. The standard package is named svn-X.Y.Z-setup.exe and the JavaHL installer file is named svn-win32-X.Y.Z_javahl.zip where 'X.Y.Z' refers to the version number.
Now skip to the "Configuring JavaHL" step below.
Macintosh OS X
Installing JavaHL is straightforward.
- Download the package from the following website: http://www.aptana.com/downloads/Subversion%201.4.6%20Universal-2.dmg
- Run through the installation process.
- Now skip to the "Configuring JavaHL" step below.
Linux
JavaHL is generally not distributed as part of the default Subversion installation. Below are a few examples of how to install it:
Ubuntu and Debian Linux:
sudo apt-get install libsvn-javahl
Red Hat:
yum install subversion-javahl
If you have an operating system not listed here, see the downloads on this page: http://subversion.tigris.org/getting.html. Make sure you choose an installation with javahl if that is noted separately.
Once this is complete, skip to the "Configuring JavaHL" step below.
Configuring JavaHL
Configuring JavaHL is slightly different on Subclipse and Subversive.
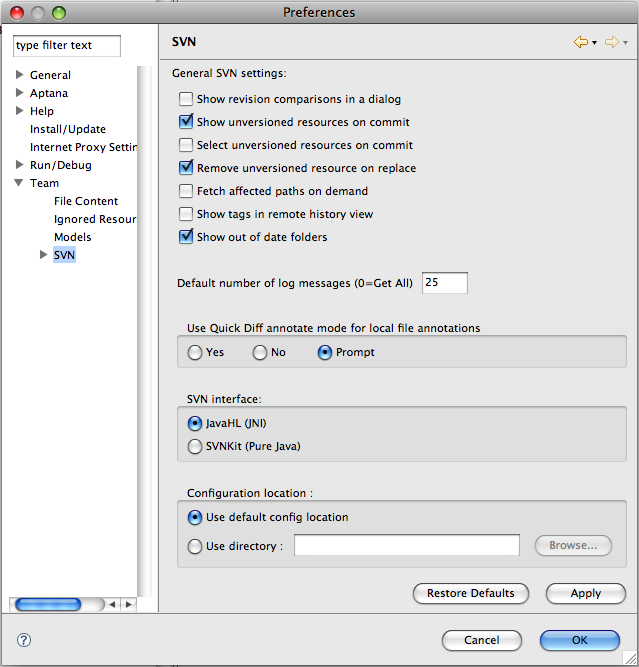
For Subclipse, edit Preferences > Team > SVN, and select JavaHL
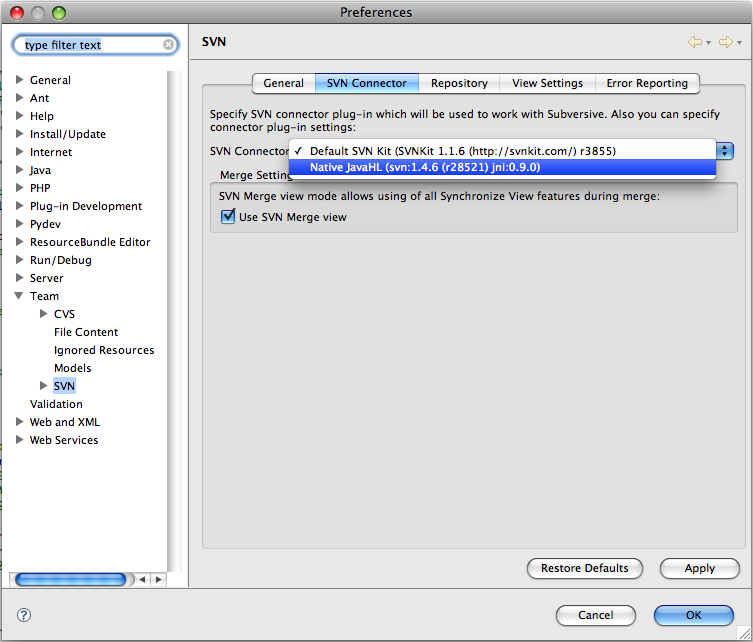
For Subversive, edit Preferences > Team > SVN, and select JavaHL
Click OK to exit out of the preferences screen.