Introduction
This guide walks you through the steps to install and run API Builder.
API Builder allows you to build and deploy API endpoints to the cloud that
can be consumed by a client application.
Setup
To run API Builder, you need to install Node.js and Axway Appcelerator CLI. If you are using Axway Appcelerator Studio 4.0 or a later version, you already have Appcelerator CLI automatically installed and can go to step 4.
- Download and install Node.js from https://nodejs.org/en/#download. Note that API Builder has been tested with Node 8.x.
-
From a console window, execute the following command to install the CLI:
npminstallappcelerator -g -
After installation, execute the setup command to install the required components:
appc setupThis installation and setup can take several minutes.
- Once the Appcelerator CLI installation and setup is completed, you will be prompted to log in. Enter your email and password.
- The CLI will send you an authorization token to your e-mail account (or a text to your mobile phone if provided during account activation). Enter the authorization token. If the authorization fails, a new code will be sent.
- Once you are logged in, you will be queried whether or not you are developing Titanium applications. If you are developing Titanium applications, enter yes. Titanium will be automatically downloaded and installed.
Create a project
To create a new project:
-
Navigate to your workspace directory and execute the following command:
appc new -t arrowAppcelerator CLI will prompt you for a project name.
- Enter a name for your project. Once you enter a project name. Appcelerator will create a new API Builder project.
-
Navigate to the project directory. For example, projectname.
cdprojectname
Run the project
To run the project locally:
-
From the project directory, execute the following command:
appc runThe CLI will download and install any dependencies for the project, then start the application. The application will launch a server that you can access from a browser or other clients. As the app is launching, you will see the various services it is starting and the localhost console URL for the application.
-
Open a browser and navigate to the Admin Console user interface (UI) of application. Typically, the URL of the Admin Console UI should be
http://localhost:8080/console. Check the console output to verify the URL.
Upon reviewing the left navigation, you can navigate to the following items:
.png?version=5&modificationDate=1510762854000&api=v2) |
Summary | Your app's admin home page. |
 |
API Doc & Test | Auto-generated documentation about your API endpoints. Provides help for the client application to access your application. |
 |
Models | Interface to help you build models. A model represents data stored from another source. |
 |
Configurations | Lists configuration files that you can modify and save within a browser. |
 |
Connectors | Lists and filters installed connectors. |
 |
Logs | Lists of access logs, clients trying to access your application. |
 |
View Documentation | Links to the Axway documentation site for API Builder's guide. |
 |
Sidebar toggle | Toggles the width of the sidebar. |
You can disable the Admin Console by changing the configuration settings
in the conf/default.js file. For now, let's explore some of the features of the Admin Console.
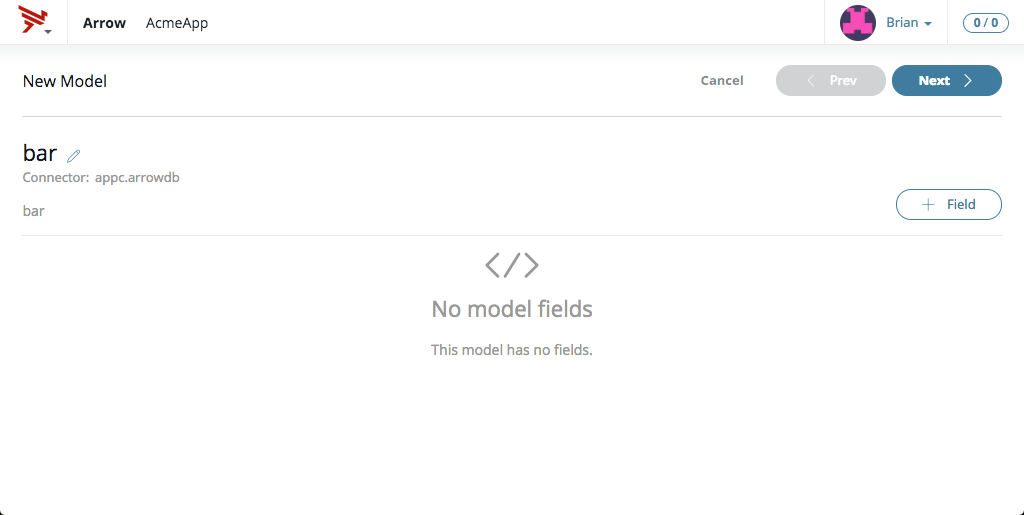
Create a new model
Let's create a new model using the Admin Console. In the Admin Console,
- Click the
 Models tab.
- Click the + Model button on the right side.
- In the New Model step:
.png?version=4&modificationDate=1510763189000&api=v2)
- Enter "simpleuser" in the Model name field (required). The name must be unique for all of the application's models.
- Select a Connector from the drop-down list (required). Connectors are used to persist data to the model.
- Add a description.
- Click Next to move onto the fields step.
- In the Create Model Fields step:
- Click the + Field button.
- Enter "first_name" in the Field name field (required).
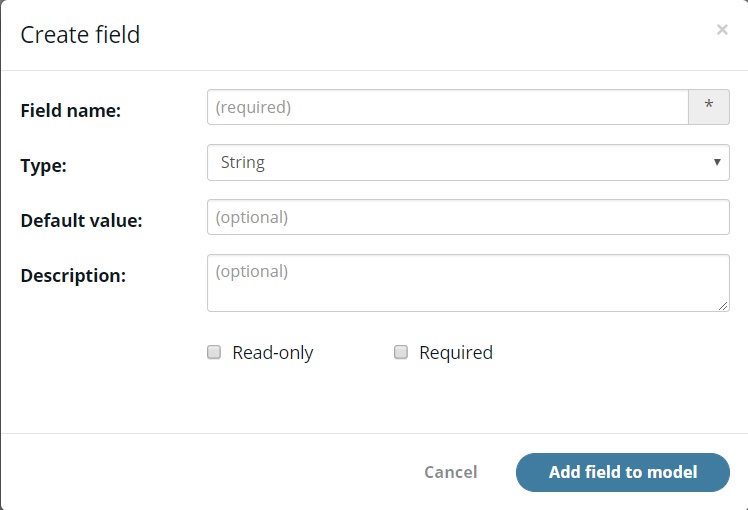
- Set Type to String.
- Leave Default value empty.
- Add a description.
- Check the boxes for Read-only or Required as necessary.
- Click the Add field to model button.
- Repeat step 4 as necessary to add the "last_name" and "email" fields to this model. After you add the fields, you can configure them by changing properties or adding validation or return logic.
- Click Next to move onto the endpoint step.
- In the API endpoint page:
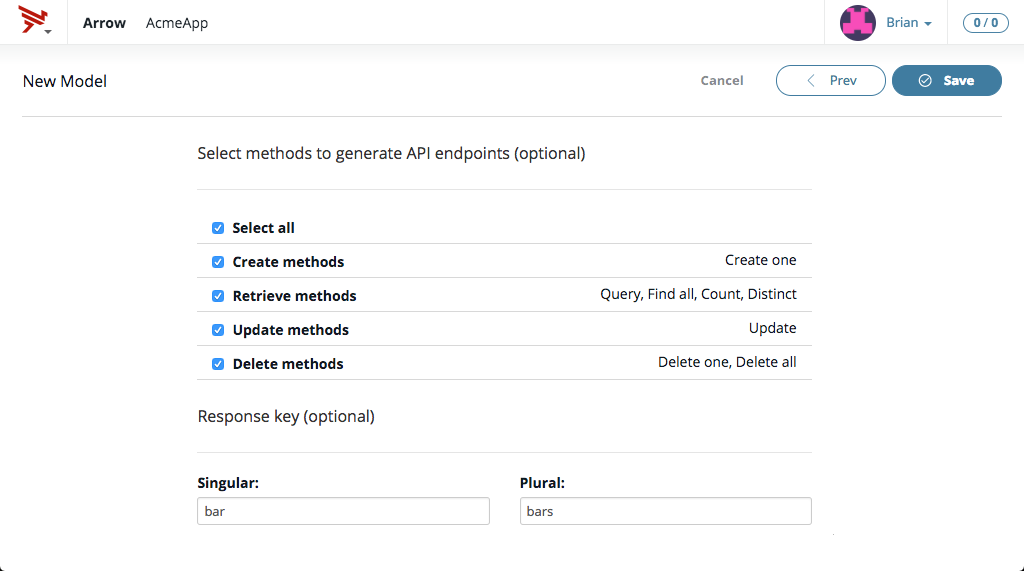
- Make sure the Create, Retrieve, and Update methods are checked. Since the Delete methods checkbox is not checked,
the
DELETE api/simpleuserand theDELETEALL api/simpleuserendpoints will not be generated but all the other default endpoints for this model will be. - Click Save to commit your new model to the app.
- Make sure the Create, Retrieve, and Update methods are checked. Since the Delete methods checkbox is not checked,
the
If you look in your project's models folder, notice you have a new file called simpleuser.js. This file was just created by the Admin Console. Instead of creating
a model using the Admin Console, you can define one using JavaScript files
in the project's models directory.
Access model data
Now that you have created the simpleuser model, let's try to retrieve the model data from the application. In the Admin Console:
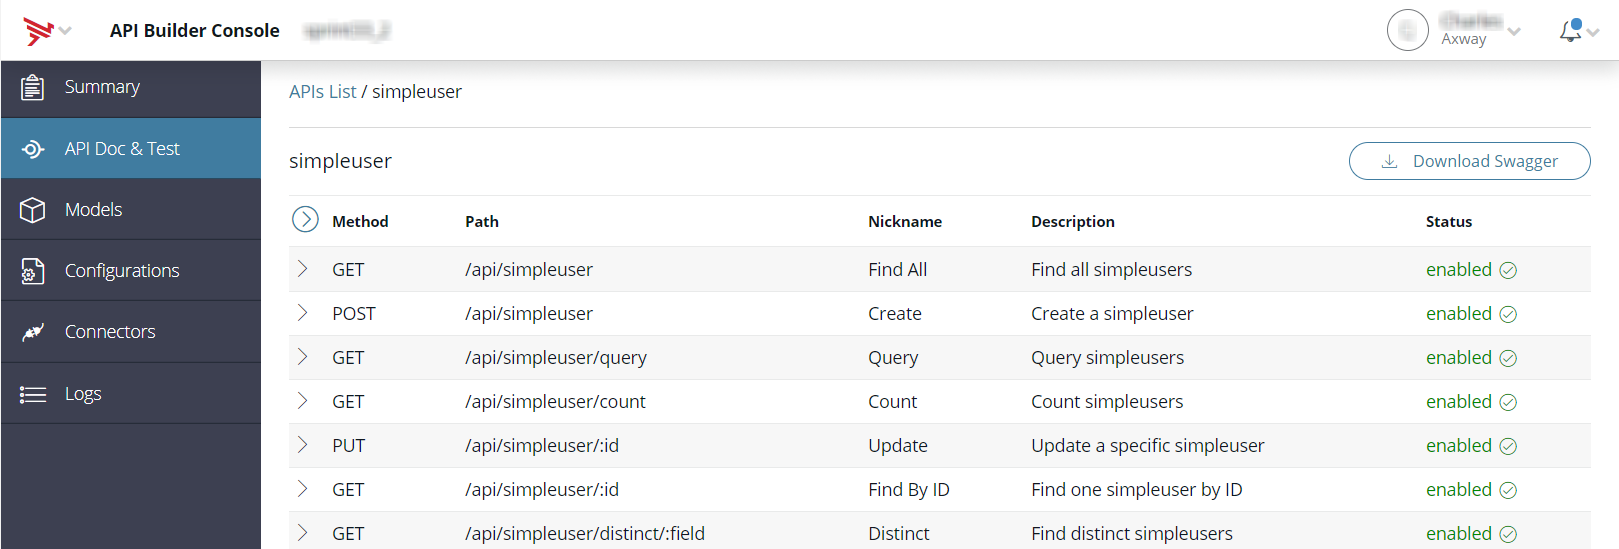
- Click the
 API Docs & Test tab. This page lists all the API endpoints that your application
exposes. You can also add or import API endpoints via the + API button. For additional information, refer to Manage Endpoints.
API Docs & Test tab. This page lists all the API endpoints that your application
exposes. You can also add or import API endpoints via the + API button. For additional information, refer to Manage Endpoints.
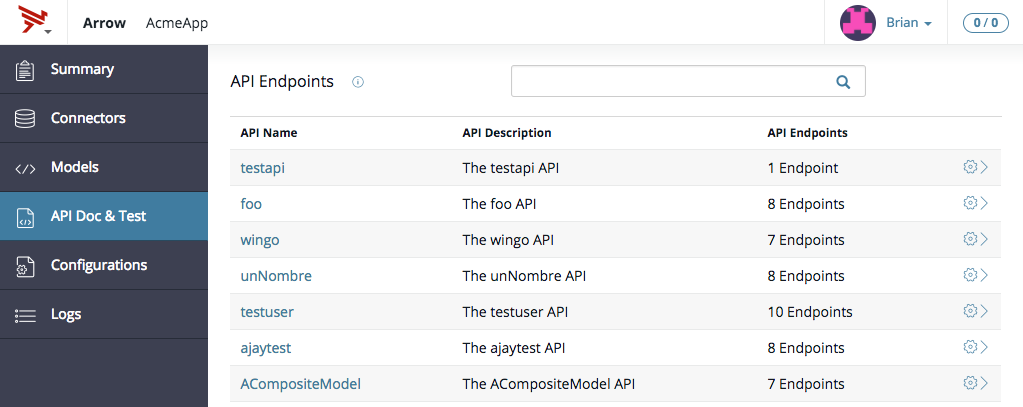
- Click anywhere on the row of any one of the API endpoints that you recently
created. The Admin Console presents all the API endpoints that can be used
to access a particular model. You can also export API endpoints via the
Download Swagger button. For additional information, refer to Manage Endpoints.
Expand one of the GET methods in your endpoint. The code example for the curl should be visible. If it's not, scroll down until the Examples section is visible and select curl.

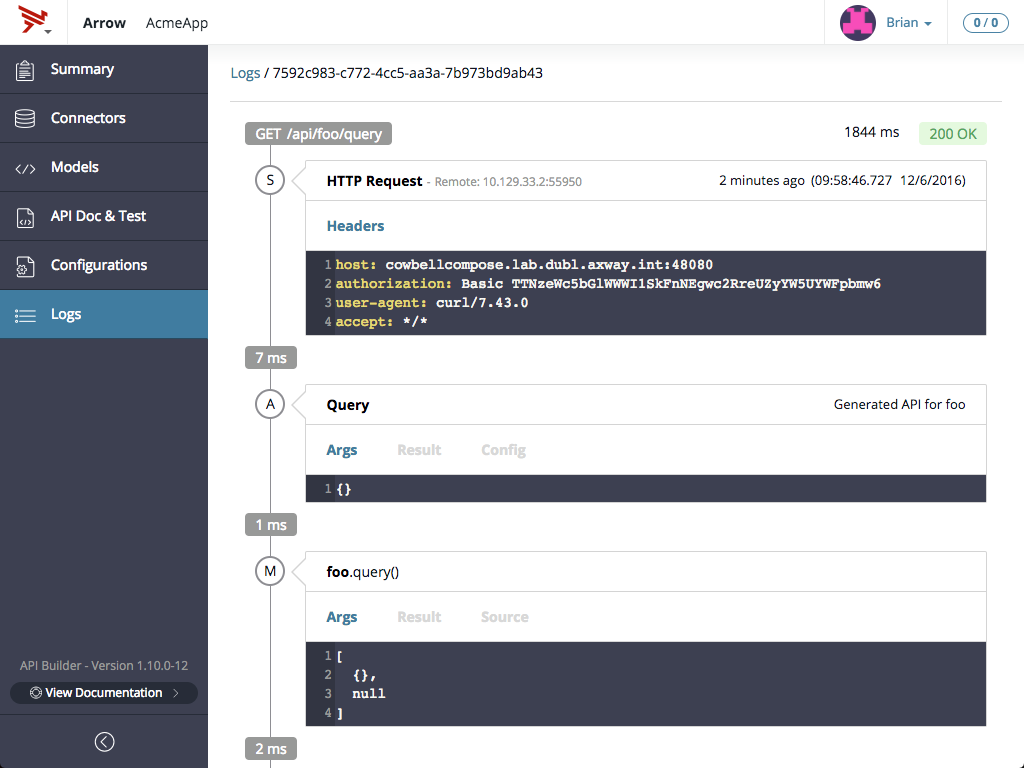
Copy a curl command and run it in a terminal. Note the message returned by this command. Alternatively, you can test the select GET method in the user interface. Scroll until the Test API section is visible, if available complete the Request, Path parameters, and Query parameters fields, and then click Execute. Note the Result returned in the user interface. - Now let's take a look at the logs to see if the command registered with
the app. Click the
 Logs tab. You should see all recent requests made to and from your applications
here, including the recent requests to and from your "simpleuser"
application.
Logs tab. You should see all recent requests made to and from your applications
here, including the recent requests to and from your "simpleuser"
application.
- If the list of events in the logs is rather long, you can filter and/or
search for particular events. In the Time drop-down (by default, it says All Time because the log is reporting
back all events), select Past 10 Minutes. If the list is still long, you can filter by and Status and Method as well. Once you found your curl call, click it to see the full report
of that event.
Add application data
Now that you have tested the simpleuser model using one its GET methods, let's add some user data to the simpleuser model using its POST method.
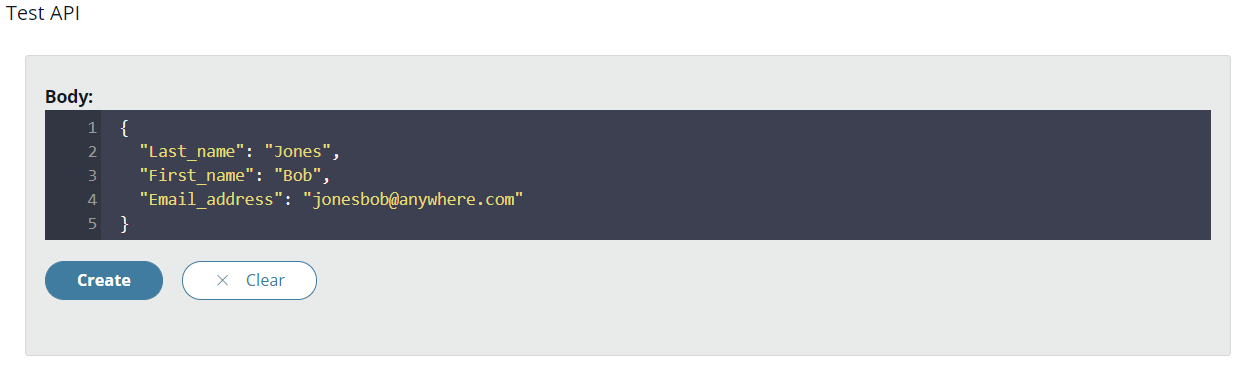
- Expand the POST method in your endpoint. The Test API should be visible. If it's not, scroll down until the Test API section is visible.
- Enter the last name, first name, email address of a simple user.
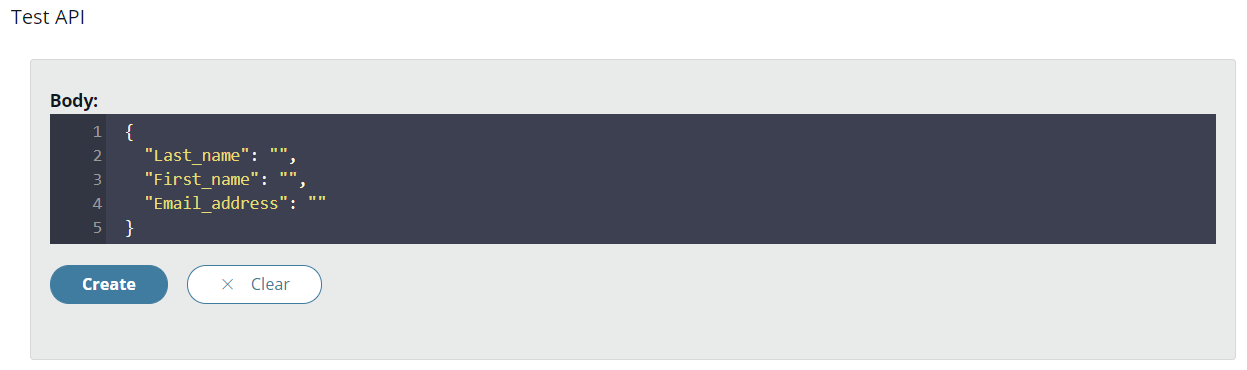
- Click Create and view the Result. Verify that the simpleuser has been created.
- Repeat steps 2 and 3 to add additional simpleusers to your simpleuser model.
Test other API endpoints
With a new project (by default), you can navigate to the app's API auto-generated
documentation and it's examples pages by pointing a browser to http://localhost:8080/apidoc and http://localhost:8080/example respectively.
The example URL shows a simple example of an API Builder Web interface. An API
Builder Web interface creates an API endpoint with access to a render engine
and your Model data that displays HTML content.
After locally testing the application, let's try it out in the cloud. To stop the server, hit command/control + C in the terminal where you launched the app.
Deploy the project
To deploy the project to the cloud:
-
From the project directory, execute the following command:
appc publishIt will take a few minutes for your application to be deployed to API Runtime Services. After the command completes, the URL to your application will be displayed in the console.
Appcelerator Command-Line Interface, version 5.5.1Copyright (c) 2014-2016, Appcelerator, Inc. All Rights Reserved.Publishing application ... this could take several minutesPackaging application ...Deploying application ...Starting application ...Application deployed to https://<SUB_DOMAIN_TOKEN>.cloudapp-enterprise.appcelerator.comPublished api/QuickStart2@1.0.0Tips:- Run `appc cloud logcat` to view logs.- Run `appc cloud loglist --build_log` to view the build log.- Run `appc cloud usage`forperformance metrics. - Let's quickly test the published application. In your browser, navigate to your published cloud application. You should see the API Builder Logo.
-
Note: You may have to edit your Admin Console configuration to access the application documentation in the
/apidocpath. If you have problems accessing the application documentation, set theenableAdminInProductionsetting in the/conf/default.jsfile to true. For additional information, refer to API Builder Console. - Next, go to the project's documentation. Add the
/apidoc/swagger.jsonpath to the end of the URL to retrieve the application documentation and endpoints. Retrieve the curl example of the query endpoint and execute it in the terminal. The command should return the same results when you tested the project locally.
View analytics
To view analytics about your project, go to the AMPLIFY Platform Dashboard.
- In a browser, navigate to https://platform.axway.com/#/dashboard.
- Click the Apps menu and select All Projects. You will be presented with a list of all your applications.
- Locate your new application. There will be two entry types for your application: API Builder and Mobile Backend Services. The application is the published application that you interact with. The Mobile Backend Services data source is essentially cloud storage where all your model data (at least for this example) is stored. The simpleuser model data you entered previously is stored here.
- Click the type of your application. You will be presented with an analytics overview of your application with data about API calls and the server(s) your application is running on.
- Select Analytics to view detailed analytics information about your application.

Next steps
Review the API Builder Project page to learn more about API Builder projects, then review the other subtopics in the API Builder page to learn how to build the components for your project.