
This page describes how to export an Adobe AIR project from the Aptana IDE.
Contents |
Introduction
You can export an AIR project using Aptana's Export AIR Package tool, which creates a portable AIR application that can be installed on a desktop machine.
Instructions
Exporting the application
To export an AIR project:
- On the Aptana toolbar, click the Export AIR Package button
 to open an AIR Package Contents pop-up window.
- From the Project drop-down list, select your AIR project.
The Include files box is automatically populated with the files for your project.
- From the Application Descriptor drop-down list, select the .xml file for your project.
- In the Include files box, check the boxes next to all of the files that you want to include in your application.
- In the Save as... field, browse to the location where you want to save the exported .air
file, and type a name for the .air file. Make sure that you include the
.air file extension (shown below.)
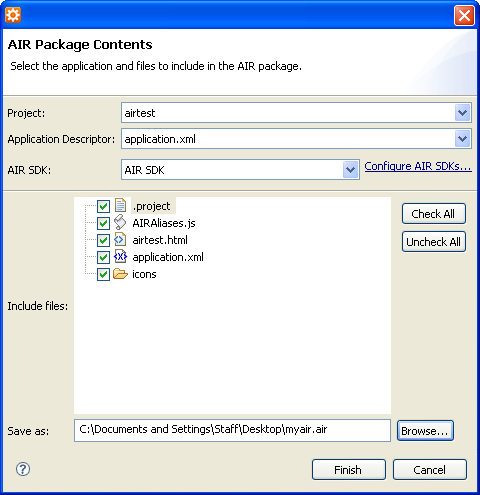
- Click the Finish button to export your AIR application.
Installing the application
After you have exported the AIR application as an .air file, you can then install the application to your computer.
To install the exported AIR application:
- Navigate to the location where you saved the .air file.
- Double-click the .air file icon.
- Follow the instructions in the wizard to complete the installation.