The AMPLIFY Appcelerator Platform Services SDK for Android provides APIs for your Android application built with Java to access Mobile Backend Services (MBS).
Getting the SDK
To download and start using the SDK, you first need to register your Android application in Dashboard. See Managing Non-Titanium Client Applications in Dashboard for details on registering a new application. After you register the application, a service key is generated that associates your application with all the Platform services. Appcelerator Dashboard also provides full instructions for enabling all Platform Services in your application. This guide will deal specifically with enabling and using MBS in an Android application.

Running the APSCloud example application
The SDK ZIP file includes an Android sample project that demonstrates basic usage of each of the Cloud APIs. To run the sample you first need to register a new application in Dashboard to obtain the necessary service key. You will then copy the key into the imported sample project's main Activity and then run the application.
To create the APSCloudExample application in Dashboard:
- Login to the Dashboard.
- From the Orgs menu, select the organization to associate with the application. Note that the Orgs menu will not appear if you are not a member of multiple organizations.
- Click the Add menu (+) and select Register App for Services.
- In the dialog:
- Type APSCloudExampleApp (or another name) in the Name field.
- Select Android from the Platform menu.
- Select any category from the Category menu.
- Click Next and then click the Overview tab.
- Click the Services tab, then click Show Key under Cloud > Performance > Analytics.
- Select Development from the Environment menu, then click the clipboard icon to copy the key to your clipboard.
Next, import the APSCloudExample project into Eclipse, copy the key from your clipboard into the application's main activity, and run the application.
To import the completed APSCloudExample project:
- In Eclipse, select File > Import > General > Existing Code into Workspace, then click Next.
- Click Browse and navigate to the
appcelerator-sdk-android-<VERSION>/examples/APSCloudExamplefolder, and click Open. - Click Finish.
- Open
src/main/java/com/appcelerator/apscloudexample/MainActivity.java. -
Locate the following line of code and replace << YOUR APP KEY >> with the application key you copied to your clipboard previously.
APSServiceManager.getInstance().enable(getApplicationContext(), "<< YOUR APP KEY >>");; -
Run the application on an Android device or emulator.
Once the application is running, try the following:
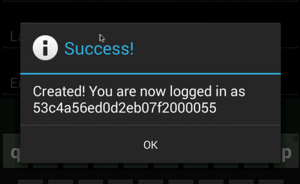
- Create a new user by selecting Users > Create User. Enter a username, password and password confirmation, then click Create. If the user is created successfully, the following dialog is shown:
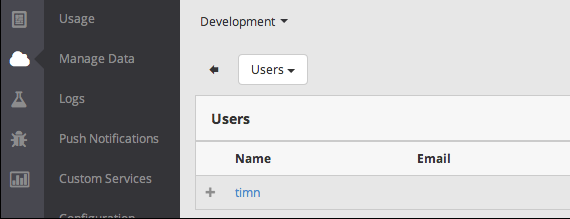
- View the newly created user in Dashboard:
- Open Dashboard and select your application from the Apps menu.
- Select Cloud > Manage Data, then click Users in the Manage Data Object table. You should see the user you created
listed in the Users table.
Enabling Cloud services in a new project
Once you've registered an application in Dashboard, downloaded the SDK, and obtained your application service key, there are few steps to enable Cloud services in your Android project.
To enable the Cloud services in your project:
- Copy
appcelerator-sdk-android-<VERSION>.jarto your project'slibsfolder. -
Add the following permission to your project's
AndroidManifest.xmlfile:<uses-permissionandroid:name="android.permission.INTERNET"/>` -
Import the APSServiceManager class into the project's main Activity:
import com.appcelerator.aps.APSServiceManager; -
Call
APSServiceManager.getInstance().enable(), passing it the application context and the application key provided by Dashboard:APSServiceManager.getInstance().enable(getApplicationContext(),"<<YOUR APP KEY>>");At this point, your application can begin making API calls. Note that the application will need to import additional classes, depending on which APS APIs it uses.
Making API Calls and Handling Responses
The com.appcelerator.aps package contains a collection of classes whose methods map to individual
REST API method endpoints. For example, the APSUsers.create() method corresponds to the /users/create.json method endpoint.
Alternatively, you can use the generic APSCloud.sendRequest() method to make REST calls directly against the Cloud APIs. For more information, see Making Generic REST API Calls.
Building Request Parameters
The first parameter of each Cloud API method is a HashMap object that contains the parameters to send with the request. For
example, the APSPhotos.show() method takes a photo_id parameter whose value is, naturally, the ID of the photo to show.
// Create dictionary of parameters to be passed with the requestHashMap<String, Object> data = new HashMap<String, Object>();data.put("photo_id", photoId);APSPhotos.show(data, new APSResponseHandler() { ...}); |
Handling Responses
The second parameter of each method call is an instance of APSResponseHandler, an interface that has the following signature:
public interface APSResponseHandler { void onResponse(final APSResponse e); void onException(final APSCloudException e);} |
The instance you specify must override the onResponse and onException methods. The onResponse method is invoked upon completion of a Cloud API call, and the onException handler is invoked if there is an exception while communicating with
the MBS server.
The APSResponse object provides getter methods to access information about the response.
For instance, the getSuccess() method returns a boolean indicating if the method call was successful
or not; the getResponse() method returns a JSON-encoded object with the results of the method
call.
|
1
2
3
4
5
6
7
8
9
10
|
@Overridepublic void onResponse(final APSResponse e) { if (e.getSuccess()) { // Read JSON response JSONObject res = e.getResponse(); } else { // Log error message: Log.e("LOGIN", e.getMessage()); }} |
The onException() handler is invoked for any exceptions that occur during communication
with the MBS server.
@Overridepublic void onException(APSCloudException e) { // Handle exception Log(e.getErrorType(), e.getErrorCode());} |
Example: APSUsers Login Call with Response Handler
The following example logs in an existing MBS user by their username and password. After a successful login, the application updates a TextView object with the user's MBS username.
|
1
2
3
4
5
6
7
8
9
10
11
12
13
14
15
16
17
18
19
20
21
22
23
24
25
26
27
28
29
30
31
32
|
HashMap<String, Object> data = new HashMap<String, Object>();data.put("login", "username");data.put("password", "password");try { APSUsers.login(data, new APSResponseHandler() { @Override public void onResponse(final APSResponse e) { if (e.getSuccess()) { try { JSONObject res = e.getResponse(); // Response returns an array containing a single user JSONArray payload = res.getJSONArray("users"); res = payload.getJSONObject(0); loginTextView.setText(res.getString("username")); } catch (Exception e) { Log.e("LOGIN", "Error parsing JSON object: " + e.toString()); } } else { Log.e("LOGIN", e.getMessage()); } } @Override public void onException(APSCloudException e) { // Handle exception that occured } });} catch (APSClientError e) { Log.e("LOGIN", e.getErrorType());} |
Monitoring Request Progress
For Cloud API methods that involve uploading large files, such as APSPhotos.create() or APSFiles.create(), there is an overloaded version that takes an optional progressHandler parameter. This parameter takes an APSProgressHandler instance, which must provide an onProgress handler. This handler is periodically triggered as the file transfer
continues, and is passed an integer between 0-100 indicating the current
upload progress.
Example: APSFiles Create Call with Progress Handler
The following example uploads a file from the device (/res/raw/reference.pdf) to the MBS storage server. Since the method call requires that uploaded
data be an instance of java.io.File, the application needs to copy the resource to a read-write directory
before uploading it. Storing the file locally requires that the WRITE_EXTERNAL_STORAGE permission is included in your AndroidManifest.xml file.
The progress callback calls the setProgress() method on a ProgressBar object, displaying the status of the upload. After the request successfully
completes, the application displays a toast notification.
Making Generic REST APIs Method Calls
The APSCloud.sendRequest() method lets you easily make REST API calls directly against MBS,
rather than using the specialized classes (like APSUsers). In general, you should use the specialized classes as they provide an
easier API. However, if new REST methods are deployed to the APS Cloud
backend, this approach lets you immediately start using those methods without
waiting for an update to the SDK.
To make a generic request, you call APSCloud.getInstance() to get a reference to the shared APSCloud object and call its sendRequest() method. For each call, you must specify the following:
- REST API method endpoint relative to "api.cloud.appcelerator.com/v1". Method endpoints are listed in the corresponding entries in the REST API documentation.
- The HTTP method to use.
- Data to send with the request.
For example, to create a post, pass the sendRequest() method the following information:
- REST API method endpoint:
posts/create.json - The HTTP method to use:
POST - Data to send with the request: at a minimum, you must specify the
contentproperty.
The following uses the sendRequest() API to create a new Post object.
|
1
2
3
4
5
6
7
8
9
10
11
12
13
14
15
16
17
18
19
20
21
22
23
24
25
|
HashMap<String, Object> data = new HashMap<String, Object>();data.put("title", "What's up?");data.put("content", "The sun, the cloud, space...");try { APSCloud.getInstance().sendRequest("posts/create.json", "POST", data, new APSClient.APSResponseHandler() { public void onResponse(final APSResponse e) { if (e.getSuccess()) { try { JSONObject res = e.getResponse(); JSONArray payload = res.getJSONArray("posts"); res = payload.getJSONObject(0); latestPost.setText(res.getString("title")); } catch (Exception err) { Log.e("REST", "JSON Error: " + err.getMessage()); } } else { Log.e("REST", e.getMessage()); } } });} catch (APSClientError e) { Log.e("REST", "Error: " + e.getMessage());} |
Working with Push Notifications
The APSPushNotifications class lets your application subscribe, send and receive push notifications.
To use the class, you also need the APSCloudPush class, which provides the underlying services to handle incoming
push notifications.
To use these classes:
- Configure push services for your application.
- Add Google Play services as a dependency to your project and update the
project's
AndroidManifest.xmlfile. See the Android Project Requirements section below. - Retrieve the device token and subscribe to push notifications with MBS. See the Subscribe to push notifications section below.
Android Project Requirements for using APSCloud Push
Once you have configured your Google Cloud Messaging (GCM) or Firebase
Cloud Messaging (FCM) settings in Dashboard, there are some required configuration
changes to your Android project to use APSCloudPush. Firebase Cloud Messaging (FCM) is the new version of GCM.
Add Google Play services
APSCloudPush requires that Google Play services be included in your application.
- Download the Google Play services SDK using the Android SDK Manager.
- Copy the
<android-sdk>/extras/google/google_play_services/libproject/google-play-services_libfolder to the same workspace folder as your Android projects (not into your Android project). -
Add the following inside the
<application/>element of yourAndroidManifest.xmlfile:<meta-dataandroid:name="com.google.android.gms.version"android:value="@integer/google_play_services_version"/>
For Android Studio projects, update the dependencies field of the build.gradle file, then save and sync the gradle file.
...dependencies { ... compile 'com.google.android.gms:play-services:6.5.87'} |
For Eclipse projects:
- Import the library project into Eclipse. (From the menu, click File > Import, then select Android > Existing Android Code into Workspace, and browse to the copy of the library project to import it.)
- In the application project, reference the Google Play services library project. Right-click the project folder and select Properties, then select Android, click Add.. and select the library project.
For other projects, update the project.properties file to reference the library project:
android.library.reference.1=../google-play-services_lib |
For detailed directions, see Android Developer: Setting Up Google Play Services.
AndroidManifest changes
The following changes must be added to your project's AndroidManifest.xml to use APSCloudPush. Replace each occurrence of "YOURAPPSPACKAGENAME" with the actual package name of your application.
-
Inside the
<manifest/>element:12345678910111213<uses-permissionandroid:name="android.permission.INTERNET"/><uses-permissionandroid:name="android.permission.GET_ACCOUNTS"/><uses-permissionandroid:name="android.permission.WAKE_LOCK"/><uses-permissionandroid:name="com.google.android.c2dm.permission.RECEIVE"/><uses-permissionandroid:name="android.permission.ACCESS_NETWORK_STATE"/><uses-permissionandroid:name="android.permission.RECEIVE_BOOT_COMPLETED"/><uses-permissionandroid:name="android.permission.READ_PHONE_STATE"/><uses-permissionandroid:name="android.permission.VIBRATE"/><uses-permissionandroid:name="android.permission.WRITE_EXTERNAL_STORAGE"android:maxSdkVersion="18"/><permissionandroid:name="YOURAPPSPACKAGENAME.permission.C2D_MESSAGE"android:protectionLevel="signature"/><uses-permissionandroid:name="YOURAPPSPACKAGENAME.permission.C2D_MESSAGE"/> -
Inside the
<application/>element:12345678910111213141516171819202122232425<receiverandroid:name="com.appcelerator.aps.IntentReceiver"/><receiverandroid:name="com.appcelerator.aps.GCMReceiver"android:permission="com.google.android.c2dm.permission.SEND"><intent-filter><actionandroid:name="com.google.android.c2dm.intent.RECEIVE"/><categoryandroid:name="YOURAPPSPACKAGENAME"/></intent-filter></receiver><receiverandroid:name="com.appcelerator.aps.PushBroadcastReceiver"android:permission="com.google.android.c2dm.permission.SEND"><intent-filter><actionandroid:name="android.intent.action.BOOT_COMPLETED"/><actionandroid:name="com.google.android.c2dm.intent.REGISTRATION"/><actionandroid:name="com.appcelerator.aps.intent.DEL_GROUPED_MSG"/><categoryandroid:name="YOURAPPSPACKAGENAME"/></intent-filter></receiver><receiverandroid:name="com.appcelerator.aps.PushBroadcastReceiver"><intent-filter><actionandroid:name="android.intent.action.PACKAGE_ADDED"/><actionandroid:name="android.intent.action.PACKAGE_REPLACED"/><dataandroid:scheme="package"android:path="YOURAPPSPACKAGENAME"/></intent-filter></receiver>
Subscribe to push notifications
Once the project is setup, the application needs to register with MBS to
receive push notifications. The application should do this once the application
starts, for example, in the onCreate() method of the application's main activity.
To register for push notifications, the application needs to retrieve the
device token using the APSCloudPush.getInstance.retrieveDeviceToken() method, then pass the token to either the APSPushNotifications.subscribe() or APSPushNotifications.subscribeToken() method to subscribe to a push channel.
For example, the code below can be added to the main activity's onCreate() method to subscribe the device to the friend_channel:
|
1
2
3
4
5
6
7
8
9
10
11
12
13
14
15
16
17
18
19
20
21
22
23
24
25
26
27
28
29
30
31
32
33
34
|
APSCloudPush.getInstance().retrieveDeviceToken(new APSRetrieveDeviceTokenHandler() { @Override public void onError(String message) { Log.e("APSCloudPush", "Could not retrieve device token: " + message); } @Override public void onSuccess(String deviceToken) { HashMap<String, Object> data = new HashMap<String, Object>(); data.put("type", "android"); data.put("channel", "friend_channel"); data.put("device_token", deviceToken); try { APSPushNotifications.subscribeToken(data, new APSResponseHandler() { @Override public void onResponse(final APSResponse e) { if (e.getSuccess()) { Log.i("APSPushNotifications", "Subscribed!"); } else { Log.e("APSPushNotifications", "ERROR: " + e.getErrorMessage()); } } @Override public void onException(final APSCloudException e) { Log.e("APSPushNotifications", "Exception throw: " + e.toString()); } }); } catch (APSCloudException e) { Log.e("APSPushNotifications", "Exception thrown: " + e.toString()); } }}); |
Once push services have been configured, and you've obtained a device token
by registering your application to receive push notifications, you can
start calling methods of the APSCloudPush and APSPushNotifications classes.
CloudPush sample application
The SDK includes the APSCloudPushExample application that demonstrates the use of the APSPushNotifications and APSCloudPush APIs. To run the sample application, you'll first need to create
an Android application in Dashboard (or use an existing application) and
configure its push notification settings to include a GCM or FCM sender
ID and application key. APSCloudPush requires Google Play services, so you'll also need to add that library
as a dependency to your project.
To import and run the APSCloudPushExample application:
- In Eclipse, select File > Import > General > Existing Projects into Workspace and click Browse.
- Navigate to the
appcelerator-sdk-android-<VERSION>/examples/APSCloudPushExamplefolder and click Open. - Click Finish to import the project.
- Add the Google Play services to your project (see Android Project Requirements for instructions).
-
In MainActivity.java, locate the following line and replace << YOUR APP KEY >> with the application key generated by Dashboard (see instructions):
String appKey ="<< YOUR APP KEY >>"; - Run the application on an Android device or emulator.